|
WHAT IS
3D RAD?
CLICK HERE
TO FIND OUT!
|
|
|
ValueLabel
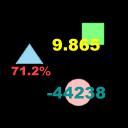
Attach numerical labels to any 3d object and display its internal values.
Digit size, color, transparency, offset and format are definable.
USAGE
Add the ValueLabel object to your project, link it to all the object you want to
read the values from and also to all 3d objects you want to attach a label to.
You link objects together in the Object List (left side of 3D Rad main screen), by
selecting an object and then checking the other objects you want to link to it.
To configure the ValueLabel object, double-click it in the
Object List to open the following property dialog:
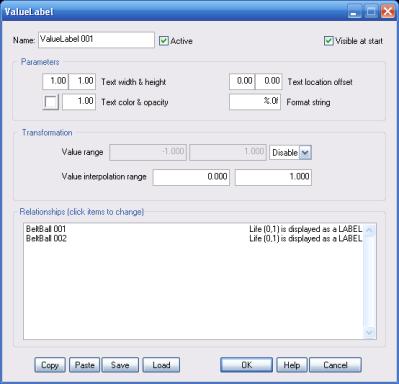
Text width & height
Any size is allowed for the digits, but values bigger than 2.0 may affect rendering quality.
Text location offset
The current screen location of the target object center is used as a reference.
The offset is in screen units.
Text color & opacity
Click the color button to open the color picker.
Opacity must be between 0.0 (invisible) and 1.0 (fully visible).
Format string
This string specifies the visualization format of the printed value. Examples:
%.0f - any number of digits for the integer part, zero digits for the fraction part (e.g. 1321)
%3.0f - at least 3 digits for the integer part, zero digits for the fraction part (e.g. 321)
%2.3f - at least 2 digits for the integer part, 2 digits for the fraction part (e.g. 32.731)
%05.1f - at least 5 digits for the integer part, 1 digit for the fraction part.
If the integer part has less than 5 digits, missing spaces are filled with zero's (e.g. 00321.3)
%.0f%% - any number of digits for the integer part, zero digits for the fraction part.
Also append a percent-symbol (%) to the value (e.g. 77%)
Value range
Before printing, the source value can be clamped or wrapped within a specified range.
For example, if the source value is 48 and the range is 50,100, in clamp-mode the printed value is 50
and in wrap mode it is 98.
Value interpolation range
Before printing, the source value can be transformed by using two interpolation values as reference. Examples:
Interpolation range is 0,100: the source value is printed as zero when it is zero and as 100 when it is 1.
Intermediate source values produce intermediate printed values (e.g. source = 0.5, printed value = 50)
Interpolation range is 150,200: the source value is printed as 150 when it is zero and as 200 when it is 1.
Intermediate source values produce intermediate printed values (e.g. source = 0.5, printed value = 175)
Interpolation range is -1,1: the source value is printed as -1 when it is zero and as 1 when it is 1.
Intermediate source values produce intermediate printed values (e.g. source = 0.5, printed value = 0)
Interpolation range is 10,-20: the source value is printed as 10 when it is zero and as -20 when it is 1.
Intermediate source values produce intermediate printed values (e.g. source = 0.5, printed value = -5)
Interpolation range is 0,1: the source value is printed as is (no transformation)
Relationships
This list defines how the ValueLabel object relates to the object linked to it.
The following relationship types are supported:
IGNORE. Do nothing.
[parameter] is displayed as a LABEL. Display the specified internal value of the
3d object as a label attached to it.
[parameter] is displayed as another object's LABEL. Read the specified internal value of the object
but attach the resulting label to the object marked as ATTACH LABEL (see below).
Please see linked object's documentation (INTERNAL PARAMETERS section)
for details on the internal parameters it supports.
NOTE: if you specify two or more objects as source,
the resulting printed value is the average of all source parameters.
ATTACH LABEL. Attach to this object the numeric label generated from the
'[parameter] is displayed as another object's LABEL' object (see above).
Visible at start
Whether to show the labels when the project is run. If this option is unchecked, you will have
to link this object to an event object like for example EventTimer
in order to visualize them.
For information about the remaining controls, please click here.
|
|