WHAT IS
3D RAD?
CLICK HERE
TO FIND OUT!
SkyBox
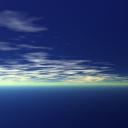
A customizable surrounding background for your projects.
Once you have installed the SkyBox object, simply add the object to your project.

The first step is duplicating the
C:\3D Rad\3DRad_res\objects\SkyBox\data\skybox
folder. Give the cloned folder a proper name (eg MySkyBox).
Duplicate the
C:\3D Rad\3DRad_res\
objects\SkyBox\data\index\skybox.jpg
file and give it the same name as the cloned folder (eg MySkyBox.jpg).
Create your own skybox .jpg files (skybox textures). To do so you can use a scene rendering software to generate six different image files representing a scenery as seen from six 90-degrees-fov cameras placed at the origin and oriented respectively toward +X,-X,+Y,-Y,+Z,-Z world axes.
The file name of each image must be in the form skybox_XX.jpg, where XX can be
px (positive X face)
nx (negative X face)
py (positive Y face)
ny (negative Y face)
pz (positive Z face)
nz (negative Z face)
Save your skybox textures to the
C:\3D Rad\3DRad_res\objects\SkyBox\data\MySkyBox
folder, making sure they replace (overwrite) the exisiting .jpg files there.
In the property dialog for the SkyBox object you can now click the Change button and double click the new skybox thumbnail.